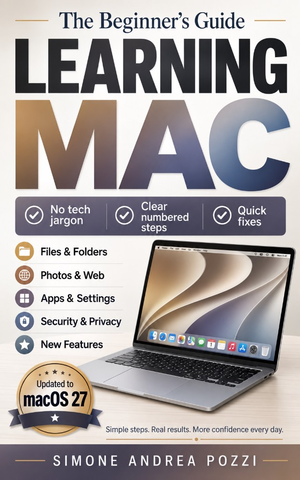
Introduction & Chapter 1
Wherever you’re starting, you’re in the right place.
This is not a tech manual. It’s a clear, friendly guide that helps you use your Mac to write, connect, explore, and enjoy.
Introduction
Maybe this is your first Mac. Maybe it’s your first computer in a while. Or maybe you’re switching because you want something simpler and more comfortable to live with day to day.
Wherever you’re starting, you’re in the right place. This is not a tech manual. It’s a clear, friendly guide that helps you use your Mac to write, connect, explore, and enjoy.
I’ve spent years helping people learn Macs, iPhones, and iPads. Some were brand-new users. Some were students. Some were busy professionals. Many arrived nervous, worried they might “ruin something.”
They didn’t. They learned. And so will you.
Why a new Mac can feel intimidating
A new computer can feel like a lot at first. The screen is beautiful, sure, but the desktop is unfamiliar, and the icons don’t explain themselves.
The good news: you don’t need to memorize everything. You need a few clear starting points, taken step by step.
If you can use a TV remote, drive a car, or make a cup of tea, you already know how learning works. Small, steady steps. Repetition. Confidence.
A story worth sharing
Many years ago, I worked with Enrico, an 80-year-old first-time computer user who wanted to write his life story.
He tried a typewriter, but every mistake meant starting a whole page over. He was ready to give up.
We sat down with a Mac. I showed him how writing on a computer works: fixing a typo in one moment, moving a sentence without retyping a page, reshaping a draft without starting from zero.
Weeks later, he handed me a printed chapter. It wasn’t just words on paper. It was relief and momentum.
That’s what learning a computer can give you: space for your voice, your connections, and your projects.
What a Mac can do for you
A Mac can help you with everyday life, like:
- Writing letters, notes, and documents
- Browsing the web without feeling overwhelmed
- Staying in touch by email and video calls
- Organizing and editing photos
- Watching shows, movies, and listening to music
- Supporting hobbies (recipes, classes, puzzles, light games)
- Working smoothly with your iPhone or iPad (sharing photos, notes, and copy/paste)
You don’t need to be “tech-savvy.” You just need a bit of curiosity and a guide you can trust.
“I’m not a tech person”
A lot of people say this.
But you’ve learned plenty of things that felt unfamiliar at first. Driving. Using a microwave. Sending your first text. You didn’t need a special “tech gene.” You needed clear steps, in a sensible order.
That’s the approach here.
What this book offers
You’ll get:
- Short, clear steps in plain English
- Friendly explanations of terms, with everyday analogies
- Helpful visuals so you can recognize what you see
- A few strong real-life examples (not a pile of them)
- Calm encouragement, without pressure
We’ll cover everything from getting started to browsing safely online, from email basics to keeping passwords secure. You’ll learn the skills that make a Mac feel like yours.
The real goal is confidence. Over time, “What’s that button?” turns into “I’ve got this.”
How to use this book
There’s no single right way.
You can read from page one and build steadily, or jump to the chapter you need today. Keep your Mac nearby and try the steps as you read. Pause when you like. Come back later.
New terms are explained as they appear and in the Glossary. Optional features are clearly marked.
If you want the fastest route to a topic, use the Quick Finder at the back of the book: it points you to the best chapter for the job.
Updates for macOS 27 Golden Gate
Apple can adjust menus, buttons, and feature availability after publication. I keep update notes and bonus tips at yourtechmadeeasy.com/updates.
What you can do now
- Keep your Mac nearby as you read
- Try the steps, then pause
- Return later and repeat the parts that matter most
A personal note from the author
This book is close to my heart because it grew out of real conversations with hundreds of people from all walks of life, including my own parents, who simply wanted someone to explain things clearly.
This is now the third year in a row that I’ve updated this book for a new version of macOS. Each year, as Apple changes the Mac, I go back through these pages carefully: updating screenshots, checking steps, rewriting explanations, and making sure the book still reflects what you actually see on your screen.
That matters to me because this book was never meant to be something I wrote once and left behind. I want it to remain a guide you can trust as the Mac evolves.
Over the years, I’ve been asked every question imaginable, from “How do I send this picture via email?” to “What does this button do?” and “Is it safe to click this?”
Different people, same pattern: curiosity mixed with hesitation, and a hope that it can feel easier.
Each time I helped someone understand their Mac, I made a mental note: “I need to put this in a book someday.”
Well, this is that book.
When I wrote each chapter, I imagined someone sitting at the kitchen table or a café counter, maybe a little unsure but ready to learn. I pictured that moment of “aha!” when something finally clicks. And I wrote every word with the same care, clarity, and encouragement I’ve given my parents, my clients, and anyone else who just needed a kind, patient guide.
So, whether you’re a first-time user or just switching gears, know this: you’ve got a teacher with professional experience supporting Mac users sitting beside you on every page.
Chapter 1: Unboxing your Mac and basic setup
You did it. You’re setting up a Mac. If you feel a little nervous, that’s normal. Take a breath. We’ll go step by step.
Pick the right place for your Mac
A good spot now prevents problems later. Aim for three things: airflow, power, and reliable internet.
Keep it cool
Your Mac can get warm during heavy use. Fans may turn on. That’s normal.
- Keep it away from radiators, heating vents, and direct sun
- Do not block the vents behind or beneath it
- For MacBooks, a small stand or cooling pad lifts the computer so air can flow
If the case feels hot or the fans stay loud for a long stretch, close unneeded apps and give the Mac more breathing room.
Stay close to power
Most setups need one to three outlets:
- One for your Mac
- One for a display and printer, if you use them
A surge protector or UPS is optional, but smart:
- Lets you plug multiple items into one wall outlet
- Protects against power spikes
- Often includes a main switch for when you’re away
Get a good internet connection
If Wi-Fi is weak where you sit, consider wired internet.
- Use an Ethernet cable from your router to the Mac
- Newer Mac laptops may need a small USB-C to Ethernet adapter
Bottom line: cool spot, enough outlets, solid internet.
What’s in the box?
What’s included depends on your model.
iMac
- iMac computer (all-in-one)
- Power cable
- Magic Keyboard and Magic Mouse (wireless)
MacBook Neo, Air or Pro
- Laptop
- USB-C charging cable
- Power adapter (included with some models and in some countries; MacBook Neo is sold without one in many EU countries). If your box has no adapter, check your Mac’s charging requirements before buying one.
Mac mini
- Mac mini
- Power cable
- You provide a display, keyboard, and mouse
Keep the box. It protects your Mac for moves, repairs, and resale.
Set it up physically
This is the cables-and-power part. Take your time.
iMac
- Plug the power cable into the back until it clicks
- Plug the other end into the wall
- Press the power button on the back
- Turn on the keyboard and mouse using their power switches. The switch is on the back edge of the Magic Keyboard and underneath the Magic Mouse. If they came with your iMac, they are normally paired already.
MacBook Neo, Air or Pro
- Connect the charger. If your model has MagSafe, it attaches magnetically. The light is amber while charging and green when full.
- Open the lid. New MacBooks power on as you open them.
Mac mini
- Plug in the power cable.
- Connect a display to the HDMI port or a Thunderbolt port on the back. The front USB-C ports on recent Mac mini models are not display ports.
- Plug in a USB keyboard and mouse, which is simplest for first setup.
- Press the power button underneath the Mac mini, near the back. On some older models, the button is on the back instead.
All Macs have a power button, ports for cables, and accessories that connect quickly. Never force a plug. If it resists, it’s likely the wrong port.
Make yourself comfortable
A few small adjustments help your neck, wrists, and eyes.
For desktops (iMac or Mac mini)
- Raise the screen to eye level so you’re not bending your neck
- Use a comfortable chair, back straight, feet flat
- Avoid glare: don’t face a window, and don’t put a bright lamp behind the screen
For MacBooks
- Tilt the screen so you can see it without hunching
- For longer sessions, a riser plus an external keyboard or mouse helps
Tip
If text or the pointer feels small, we will change it soon. macOS lets you scale things up.
Keep the box and your paperwork
Hold on to the packaging for at least the warranty period, and longer if you can.
- Helpful for repair shipping and moving
- Adds value if you sell the Mac
- Keeps parts and manuals together
Save your invoice. Store it (and any manuals) in a folder or bag with the box. Proof of purchase helps with warranty or insurance.
Time to power on
- MacBooks: open the lid
- iMac: press the button on the back
- Recent Mac mini: press the button underneath, near the back
You’ll see the Apple logo and a progress bar. The first start can take a few minutes, especially after updates. Regular starts are quicker.
If nothing happens, check the power cable at both ends, then try another outlet.
If your Mac is not brand new
If your Mac is not fresh out of the box and someone else already set it up, do not ask for or use their password. Ask the previous owner to erase the Mac and remove it from their Apple Account before you continue. Otherwise, their account, personal information, or Activation Lock may remain connected to the Mac. Once the Mac restarts at Setup Assistant, return to this chapter and continue from “Meet Setup Assistant.”
This book is written for macOS 27 Golden Gate. If your Mac uses an older version, some names, buttons, and screen layouts may differ. Software Update offers only versions compatible with your Mac. If macOS 27 is not offered, do not try to force the upgrade; continue using the version your Mac supports: most of the basic ideas in this book will still apply.
Meet Setup Assistant
Setup Assistant asks a few questions so your Mac knows who you are and where you are. If you make a mistake, you can go back. Small changes appear over time, but the flow stays the same.
Language and region
Pick your language, then your country. This sets the keyboard, dates, and time zone.
- Scroll and click your language
- Click Continue, then select your country
- Variants like Canadian English match local keyboards
Tip
Choices like “Swiss French” or “Canadian English” define versions that best match your keyboard and region.
Comfort and usability
Accessibility options can be turned on now or later in System Settings.
- Options include larger text, pointer adjustments, and more
- Choose Not Now if you want to keep going
Nothing you enable here is permanent.
Wi-Fi setup
Connect to the internet so the Mac can sign you in and update itself.
- Choose your network name
- Enter the password (use the eye icon to confirm what you typed)
- If your network isn’t listed, move closer to the router or access point, or check that the router is on
Tip
If Wi-Fi is difficult to configure, you can continue with Ethernet if you have a cable and adapter.
Data and privacy
You’ll see an icon that signals Apple may use limited personal data to run features, keep services secure, or personalize suggestions. Click Learn More if you want details, then Continue.
Migration Assistant
Do you want to bring files and settings from another computer or a Time Machine backup?
- Choose Set Up as New only if you do not need files or settings from another computer. If an older Mac or Windows PC contains files you want to keep, or you have a Time Machine backup, choose the matching transfer option. If you are unsure, pause and ask for help before continuing.
- If you have a nearby iPhone or iPad that is already set up, you can choose Set up with iPhone or iPad. This can bring across settings and iCloud content. Follow the onscreen steps.
- If you are moving from an older Mac, a Time Machine backup, a startup disk, or a Windows PC, choose the matching transfer option and follow the prompts.
Sign in with your Apple Account
Your Apple ID is now called your Apple Account. It’s the single sign-in for iCloud, the App Store, FaceTime, and more.
- If you already have one, enter your email and password
- If you don’t, click Create new Apple Account and fill in your name, birthday, and a new password
Tip
Use a unique password you can enter reliably. If you decide to write it down, keep the record in a secure physical place away from the Mac, and never share it.
You can also choose Set Up Later. The Mac works without it, but you’ll miss iCloud and the App Store until you sign in.
Terms and conditions
Legal text appears. To continue:
- Select I have read and agree to the iCloud Terms and Conditions
- Click Agree
You can adjust privacy choices later in System Settings.
Create a computer account
This is your personal account on the Mac.
- Profile Picture: choose a cartoon, emoji, or photo (you can change it anytime)
- Full Name: what appears on the login screen
- Account Name: created automatically, used behind the scenes
- Password and Verify: create and confirm a sign-in password
- Hint: optional reminder
- Allow my Apple Account to reset this password: keep this checked if you want to use your Apple Account to recover access if you forget your Mac password
Click Continue.
Location Services
Turning on Location Services lets your Mac show local weather, set the correct time zone, and suggest nearby places.
- Most people leave this on
- You can turn it off and still use your Mac
Analytics
Apple asks to share anonymous usage and crash data. Sharing or not doesn’t change how your Mac works. Many people choose Don’t Share.
Screen Time
Tracks your usage by app. Helpful for understanding habits or setting limits for a child.
- Choose Set Up Later or Continue and follow the prompts
Siri
Siri can open apps, find files, and answer quick questions by voice.
- Enable it now or skip it and turn it on later in System Settings
- If enabled, follow the on-screen voice prompts
Improve Siri and Dictation
You can allow Apple to review short, anonymous audio samples to improve recognition.
- Share Audio Recordings or Not Now
You can change this later.
FileVault disk encryption
On a Mac with Apple silicon or an Apple T2 Security Chip, the storage is encrypted automatically. FileVault adds an important extra lock: someone needs an authorized account password before they can access your files. On older Macs without those chips, turning on FileVault encrypts the startup disk.
Your fingerprint is convenient for many everyday tasks, but it does not replace knowing your Mac password.
If Setup Assistant offers FileVault, read the recovery choices carefully. If you choose a recovery key, copy it exactly and keep it somewhere safe away from the Mac. Losing every available recovery method can permanently prevent access to your files.
Touch ID (if supported)
Some MacBooks and iMac keyboards have a small round sensor in the top right. Add a fingerprint to sign in, approve downloads, and use Apple Pay.
- Place your finger, lift, and rest again when prompted
- Add a couple of fingers from the same hand for convenience
Apple Pay
You can set up Apple Pay now or choose Set Up Later. It lets you approve eligible purchases on supported websites and in apps, usually with Touch ID on a compatible Mac or Magic Keyboard. It is handy, but optional.
Choose your look
Pick a theme for your Mac.
- Light Mode: bright, good in daylight
- Dark Mode: gentle on eyes in low light
- Auto: switches based on time of day
You can change this anytime in System Settings > Appearance.
You’re in! Welcome to the Desktop
You might see “Setting up your Mac…” and a welcome screen, then the macOS 27 Desktop appears. The background is crisp. The Dock sits at the bottom with app icons. The menu bar runs along the top.
Congratulations: the hardest part is behind you. If something felt off, you can revisit most choices later in System Settings. If you need to start completely over, do not erase the Mac unless you are sure there is nothing on it you need to keep; see the erase-and-reset instructions later in this book.
Wrap-up: what you can do now
- Place your Mac for airflow, power, and internet
- Connect cables, keyboard or mouse, and display (if needed)
- Power on and complete Setup Assistant
- Create your Mac account and (optionally) sign in with your Apple Account
- Turn on (or skip) Siri, Screen Time, FileVault, Touch ID, and Apple Pay
- Choose Light, Dark, or Auto appearance
Learning Mac for Beginners and Everyday Users — macOS 27
The full guide continues from here: files, photos, email, browsing safely, passwords, and the rest of everyday Mac use — numbered steps, in plain English.
Get the full guideAvailable on Amazon Kindle